Snake Eyes
Dice Faces

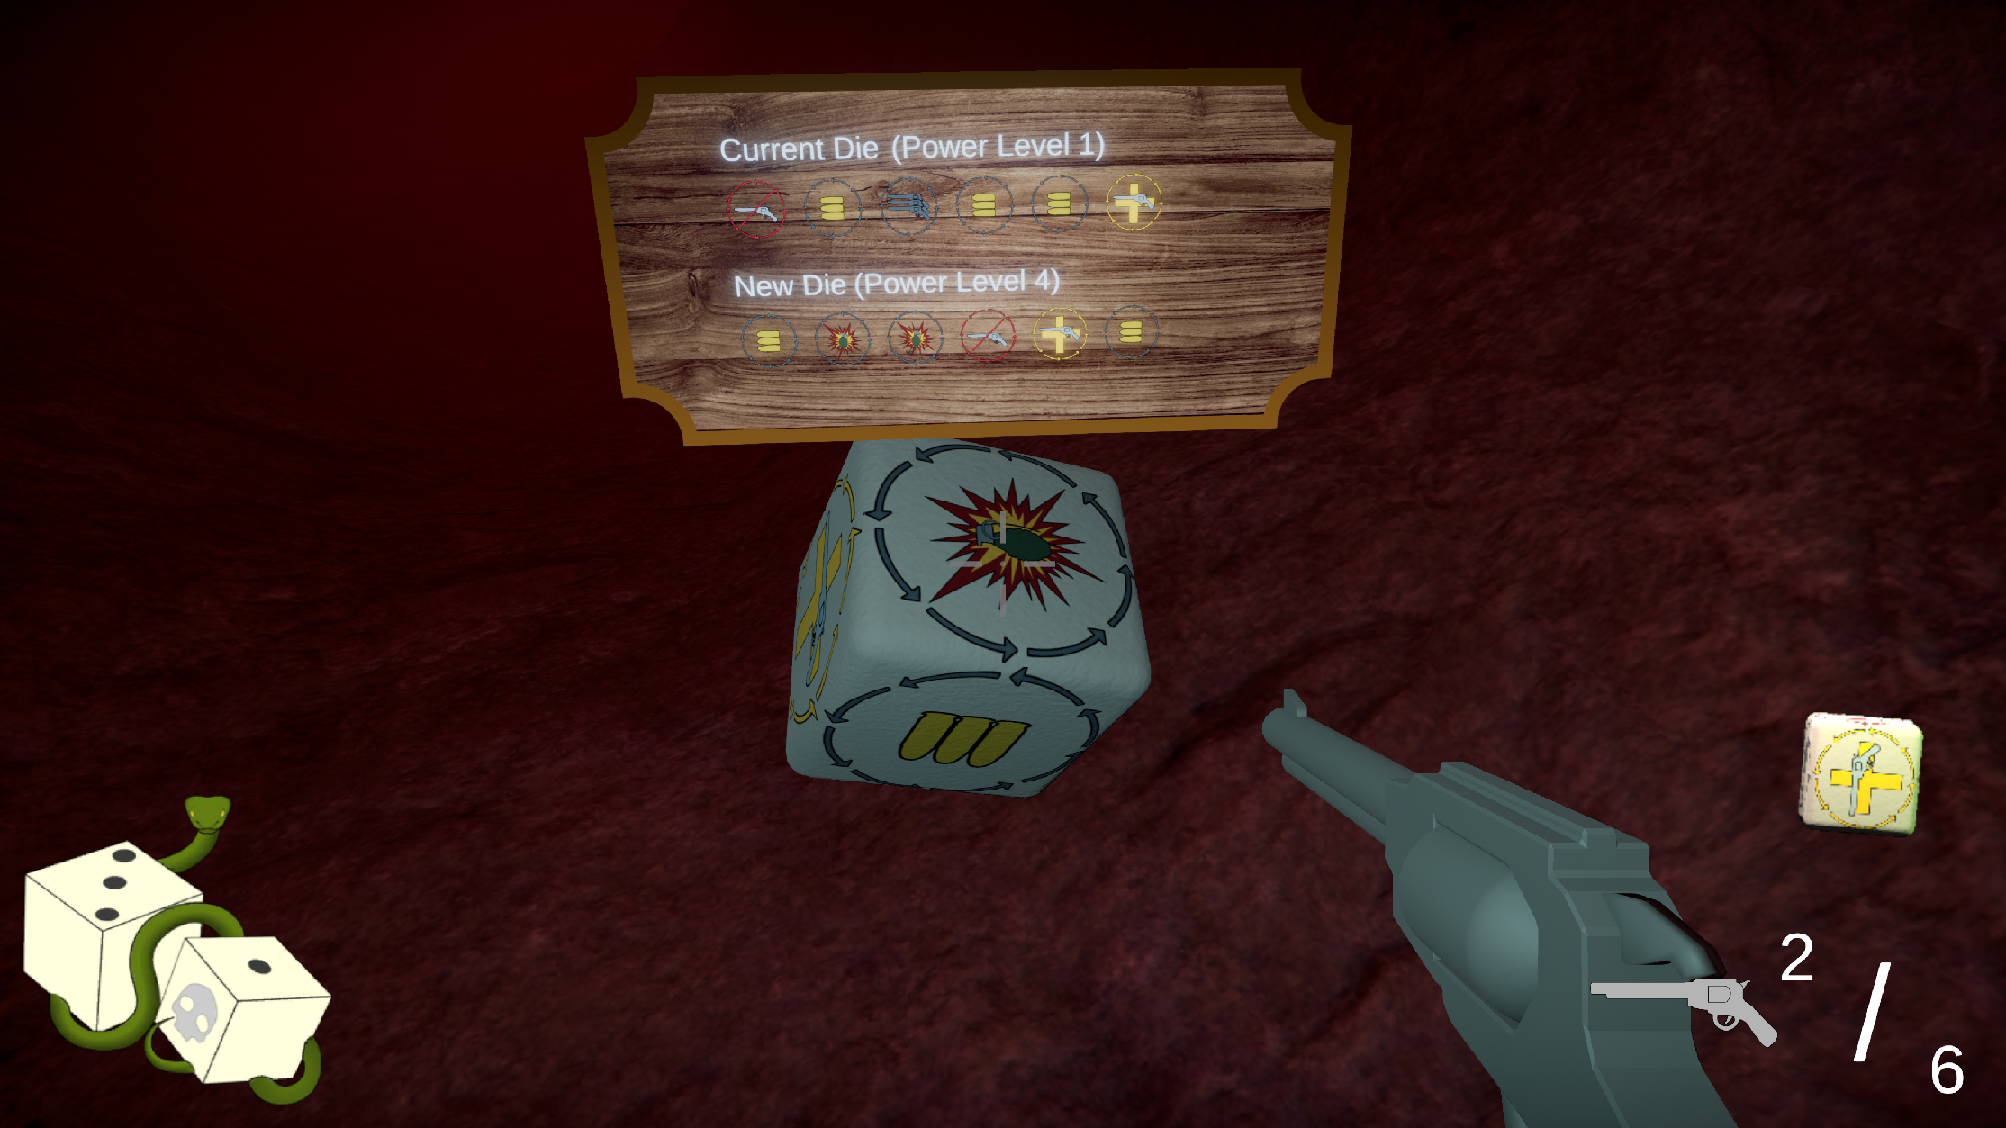
The dice system allows for each individual face to be given a sprite texture that is drawn directly on the material using a custom shader. The process includes: preparing the mesh and sprites, and writing the shader and script to control the faces. An alternative method for displaying the faces could be to create a world space canvas and use images to display the sprites. This method reduces draw calls and other overhead of using UI while allowing the faces to be lit by the scene.
The Mesh
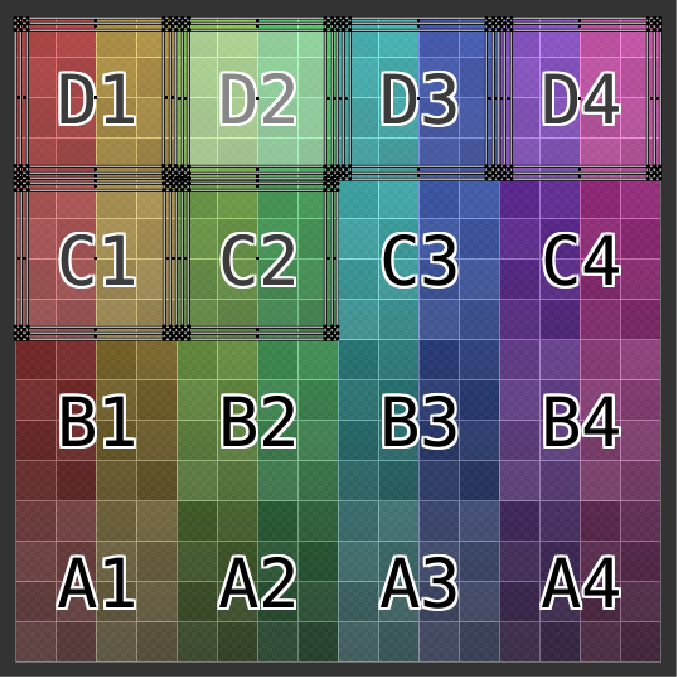
A basic cube with beveled edges provided a base for the die. This method also works for non-six sided dice but the sprites would have to be designed to fit a trilateral surface. In our case, they were more suited on a quadrilateral surface. There consists of two UV channels: one for the surface texture, and another to represent the face in sprite space. For the secondary UV, each face was fit into a 4x4 grid space. Although a 3x3 grid space would suffice, a 4x4 space allows for up to 16 unique sides. The specific order is irrelevant, so long as it moves from left-to-right, top-to-bottom for later calculations.
The Sprites
To make this method lightweight, the material receives a single texture that represents the displayed faces. We use a single sprite atlas with multiple sprites defined in the texture importer. Thus the one draw-back of this method is that all faces of the die must be present on a single texture (the atlas); of course, it's also more efficient to stream a single texture rather than multiple.
The Shader (ShaderLab)
There are 3 essential properties for this shader: the grid size (4), the atlas texture, and the remap texture. Additional properties can be used to represent the base surface. The remap texture, which is generated by the script as a 4-channel 4x4 texture, encodes the position (xy) and size (zw) for each face's grid into the pixel. The current grid is calculated from the secondary UVs and the remap is sampled using that grid. The sprite atlas can then be sampled by converting the normalized face coordinates into the sprite's space using the remapped sample. It sounds more complicated than it is, the code is only a few lines:
const float2 primary_uv = IN.uv_MainTex;
const float2 secondary_uv = IN.uv2_Atlas;
const fixed factor = 1.0 / _GridSize;
const float2 grid = floor(secondary_uv * _GridSize) / _GridSize;
const float2 face_uv = (secondary_uv - grid) / factor;
half4 remap = tex2D (_Remap, float2(grid.x, 1.0 - grid.y - factor));
fixed4 main_col = tex2D (_MainTex, primary_uv) * _Color;
fixed4 face_col = tex2D (_Atlas, remap.xy + remap.zw * face_uv);
fixed4 final_col = lerp(main_col, face_col.rgb, face_col.a);
The Script
Finally, we can write a script to connect everything together. The material for the die is supplied with the grid size, atlas, and remap textures. The atlas is assigned by the user, while the remap is generated to match the grid size.
Texture2D remap = new(gridSize, gridSize, TextureFormat.RGBAHalf, false)
{
    filterMode = FilterMode.Point,
    wrapMode = TextureWrapMode.Clamp,
};
material.SetInt("_GridSize", gridSize);
material.SetTexture("_Atlas", atlas);
material.SetTexture("_Remap", remap);
Then, each face needs to be mapped in the remap texture as a grid space. The sprite provides us with its rectangle on the atlas, this value is normalized and encoded into the pixel's 4 channels (x, y, width, height) on the remap texture.
int x = id % gridSize;
int y = id / gridSize;
Rect rect = sprite.rect;
rect.width /= atlas.width;
rect.height /= atlas.height;
rect.x /= atlas.width;
rect.y /= atlas.height;
remap.SetPixel(x, y, new(rect.x, rect.y, rect.width, rect.height));
remap.Apply();
Faces can now be assigned sprites that display on the die like a normal texture. Now that you can assign faces, you also might want to be able to retrieve them. We can preprocess the mesh by looping through its vertices, converting their secondary UV coordinates to grid-space, caching the normal for each grid, and then averaging them - you get the average direction of each face in local space.
List<Vector2> uvs = new();
List<Vector3> normals = new();
mesh.GetNormals(normals);
mesh.GetUVs(uvChannel, uvs);
Dictionary<int, List<Vector3>> grids = new();
for (int i = 0; i < mesh.vertexCount; i++)
{
    Vector3 normal = normals[i];
    Vector2 uv = uvs[i];

    int gridIndex = (int)(Mathf.Floor(uv.x * atlasSize) + Mathf.Floor((1f - uv.y) * atlasSize) * atlasSize);
    if (!grids.TryGetValue(gridIndex, out var grid))
    {
        grid = new();
        grids.Add(gridIndex, grid);
    }

    grid.Add(normal);
}
foreach (var (id, grid) in grids)
{
    Vector3 average = grid.Aggregate(Vector3.zero, (current, normal) => current + normal);
    average /= grid.Count;
    average.Normalize();

    _normals.Add(id, average);
}
This can be used to find which face is aligned, or to align the face, along an arbitrary axis. Since the preprocessing was done in local space, you would want to transform world space directions into your die's local space.
float bestDot = 0f;
int bestId = -1;
foreach (var (id, _normal) in _normals)
{
    float dot = Vector3.Dot(_normal, normal);
    if (bestId != -1 && dot < bestDot) continue;

    bestId = id;
    bestDot = dot;
}
return bestId;
There's obviously a lot more you can do with this. We originally randomized the faces but had some problems with the face mapping. Limited on time, we kept the faces predefined on a per-die basis.
Conclusion
In principle, this method seems over complicated, but in practice, it's rather quite simple. Whenever approaching a problem, take a few minutes to break down the problem into steps and visualize the solutions for each step. Initially, I knew I wanted to use a custom shader, but how would it work? The first idea that came to mind was to create an individual property for each face and assign it values manually, but as I walked that idea it started creating problems of its own. So, I took a step back, and came up with a more more autonomous method that was easier to write and deploy.
Leave a comment
Log in with itch.io to leave a comment.